
Easy DIY Step Stool
One small step for child, one giant step for all adults who no longer have to pick up and hold a growing toddler at the sink. Last weekend I built an easy DIY step stool for my niece to use in my mom’s house. It was just her size and the best part about this project is I was able to use scrap wood I had laying around. If it is free, it is for me. Who doesn’t love to save money these days am I right! Don’t happen to have any scrap wood lying around? Don’t worry. I have you covered. I’ll share what I used and all supplies can be purchased at your local hardware store. Even if you have to purchase supplies at your local hardware store this should still be a project easy on the wallet.
Supplies
1×2 at 12″
2×6 at 12″ (I used 2×6 because that is what I had in my wood pile, but a 2×8 would probably give a little bit more step room)
1×6 at 14 3/4″ (1×8 if you used a 2×8 board)
1 1/2 Pocket Hole Screws (is what I used, but wasn’t using the pocket holes screws in the traditional sense. If you are going to use a Kreg Jig and create pocket holes you will want to have pocket hole screws dependent on the thickness of wood using)
Tools
Miter Saw or Jig Saw
Clamps
Kreg Jig (Optional, but would definitely make this project even easier)
Brad Nailer (Optional – I just used to nail the top board into place and extra strength)
Let’s Make an Easy DIY Step Stool
Time is money and you can save both with this project. Once you have all of your supplies gathered you will use your miter saw or jig saw to cut your wood to size. Both end pieces, which are the 2×6 pieces (or you can use 2×8 pieces here) should be 6″ each. This is the height I made, but of course you can adjust to the height you may need depending on the age and height of your little one(s).
I also cut the support 1×2 piece about 12″, but again, you can definitely modify to your step stool needs.

Once you have these pieces cut to size you can start to put together. I clamped the two sides and the support bar into place. I then used a drill and a drill bit to pre-drill my screw holes. While clamped I screwed the support bar into place using 1 1/2 Kreg Jig pocket hole screws. Now, before you come at me with that is not how you use those. I know. I think the pocket holes screws add a little bit of a finishing touch and they hold the wood in place nicely.
Now if you have a Kreg Jig or other pocket hole system. You can definitely use the pocket hole system to make pocket holes on each end of the 1×2 support piece and actually use the pocket hole screws for their intended use. I believe the 1×2 wood I used is 3/4″ thick so you would actually use 1 1/4 pocket hole screws. I say do whatever way works best for you.
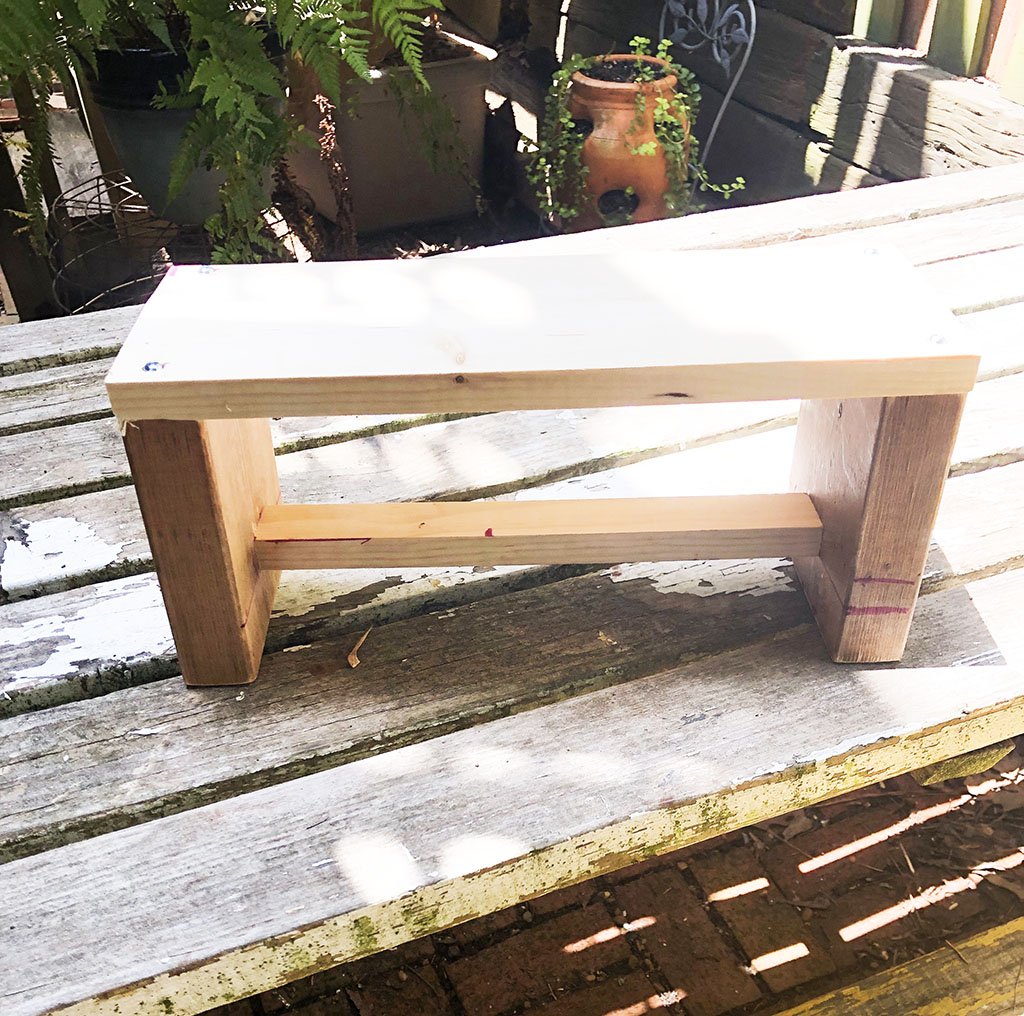
Once I put the base together it was time for the top. I didn’t want to cut the top piece until I knew the exact measurement. So once I had the base put together I measured and cut my top board. My top board ended up being 14 3/4″. You can see from the picture below that I used more pocket hole screws to give it a more finished look.
To put the top on I actually pulled out my brad nailer and glue and nailed the top board into place, placing 2 nails on each side toward the middle. This way when I went to pre-drill the board would not move and I could easily pre-drill my holes (so as not to split the wood) and then screw in my pocket hole screws. I did one in each corner as seen below.
Once completely put together it was time to stain and paint. I stained the top board and painted the bottom a really pretty green I had in my stock pile of craft supplies.

This was such an easy afternoon project and I just used supplies I already had so it was really easy on the wallet. For such an easy afternoon project I loved how this turned out. I think I see more easy diy step stool builds in my future.

Like this project? Check out some other easy projects: